开放代码社区 › Mobile MCP AI 手机自动化工具
Mobile MCP AI 手机自动化工具
AI/机器学习Python基于 MCP 协议让 Cursor AI 直接控制 Android 与 iOS 手机的自动化工具。支持自然语言操控、截图视觉识别、元素树与坐标双模式定位、按键操作验证,并能将操作录制生成 pytest 测试脚本,适用于移动端自动化测试与批量用例执行场景。
仓库地址
https://gitee.com/chang-xinping/mobile-mcp.gitREADME
# 📱 Mobile MCP AI
> 让 Cursor 直接控制手机的 MCP 工具
<div align="center">
[](https://pypi.org/project/mobile-mcp-ai/)
[](https://www.python.org/)
[](LICENSE)
[](https://developer.android.com/)
[](docs/iOS_SETUP_GUIDE.md)
**⭐ 觉得有用?给个 Star 支持一下!**
**📱 支持 Android 和 iOS 双平台**
</div>
---
## 🎬 演示
<div align="center">
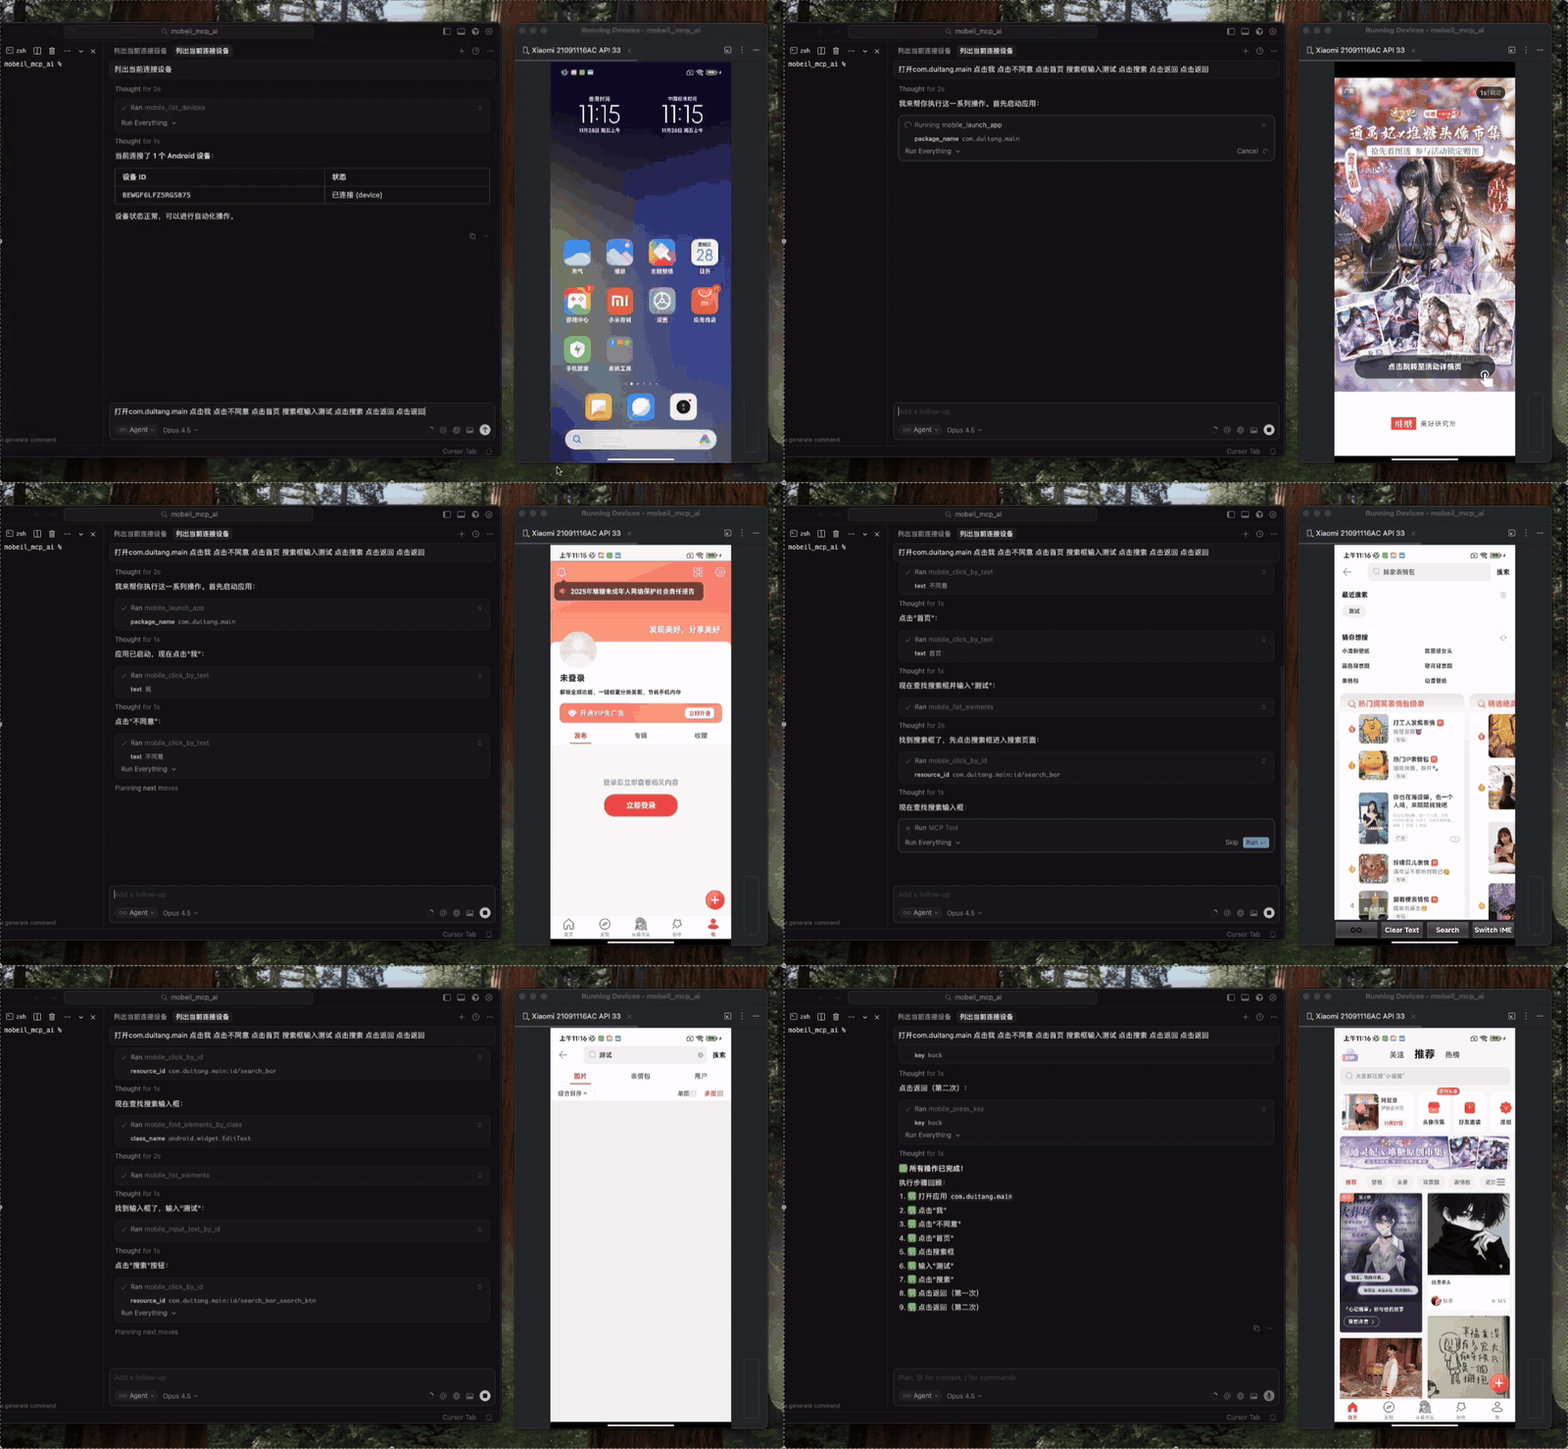
*[查看高清视频 →](https://gitee.com/chang-xinping/mobile-mcp/blob/master/docs/videos/demo.mp4)*
</div>
---
## 💬 加入交流群
<div align="center">
<img src="https://web-code-img.oss-cn-shanghai.aliyuncs.com/readme/7404011d3056856c69e19ea0.jpg" alt="微信交流群" width="300"/>
*扫码加入微信交流群,一起探讨移动端自动化测试*
</div>
---
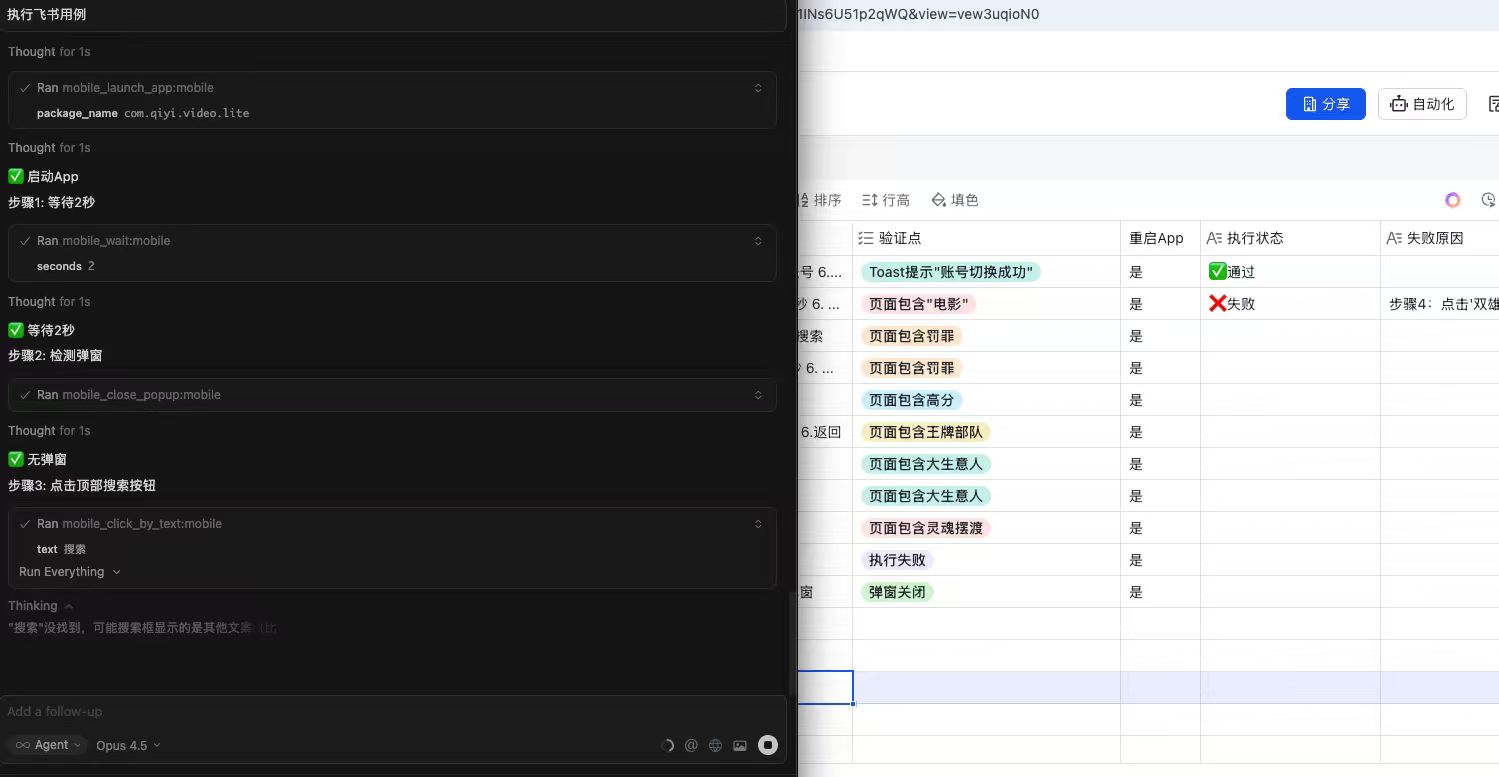
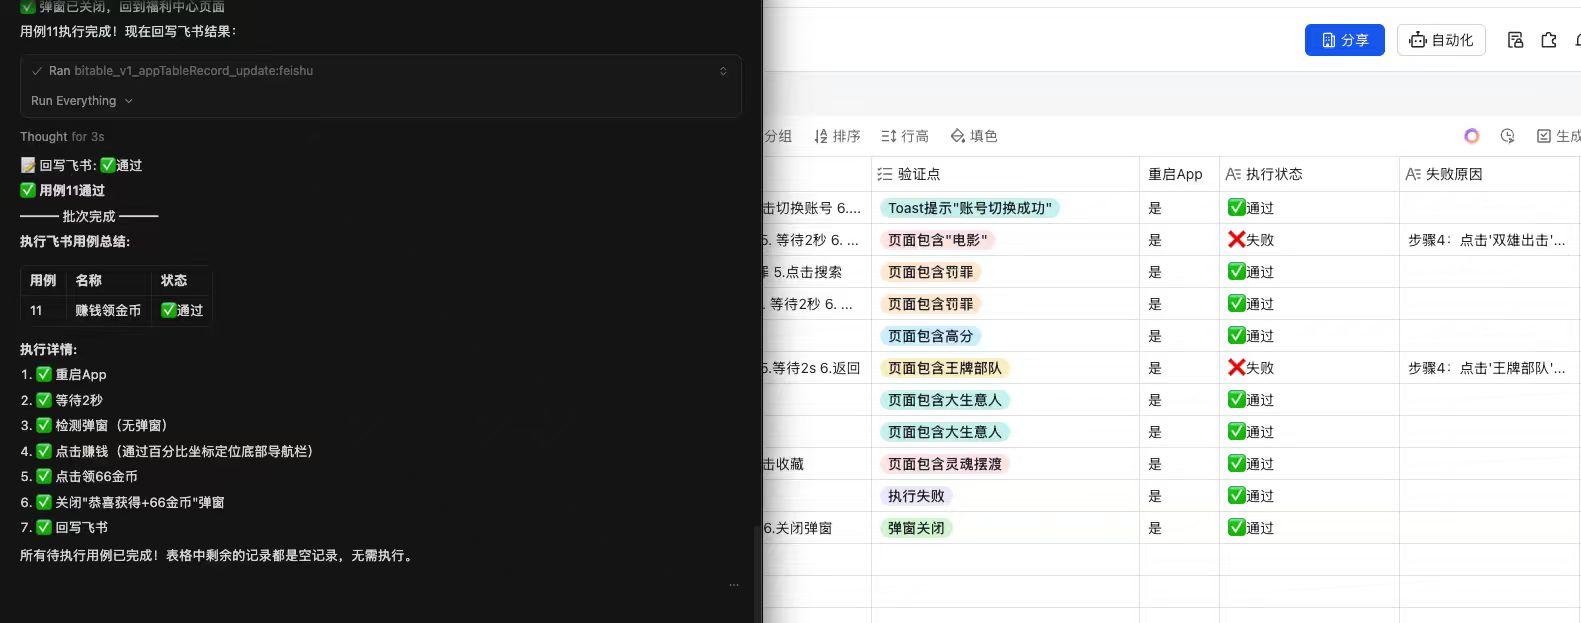
## 🗂️ 批量执行用例(飞书集成)
如果你需要从飞书多维表格批量执行用例,`mobile_open_new_chat` 功能会自动打开新会话继续执行。
**执行前(飞书多维表格配置):**
**执行后(批量执行完成):**
**macOS 用户:** 需要开启辅助功能权限
| 步骤 | 操作 |
|:---:|------|
| 1 | 打开「系统设置」 |
| 2 | 点击「隐私与安全性」 |
| 3 | 点击「辅助功能」 |
| 4 | 点击 + 号,添加 **Cursor.app** |
| 5 | 确保开关已打开 ✅ |
> ⚠️ 没有此权限,无法自动打开新会话继续执行
**Windows 用户:** 需要安装额外依赖
```bash
pip install mobile-mcp-ai[windows]
```
或手动安装:
```bash
pip install pyautogui pyperclip pygetwindow
```
---
## ✨ 核心特性
<table>
<tr>
<td width="50%">
### 🧠 AI 原生驱动
基于 MCP 协议与 Cursor AI 深度集成,自然语言直接操控手机,告别繁琐的脚本编写
</td>
<td width="50%">
### 👁️ 视觉智能识别
Cursor AI 自动分析截图,精准定位 UI 元素,游戏、原生应用通吃
</td>
</tr>
<tr>
<td width="50%">
### ⚡ 零配置启动
`pip install` 一行命令,开箱即用,无需额外 AI 密钥
</td>
<td width="50%">
### 🔄 一键生成脚本
操作即录制,自动生成可复用的 pytest 测试脚本
</td>
</tr>
<tr>
<td width="50%">
### 🎯 双模式定位
元素树 + 视觉坐标双引擎,普通 App 秒定位,游戏场景不迷路
</td>
<td width="50%">
### 🛡️ 智能验证机制
按键操作自动验证生效,告别"假成功"
</td>
</tr>
</table>
---
## 📱 平台支持
| 平台 | 支持状态 | 系统要求 | 配置指南 |
|:---:|:---:|:---:|:---:|
| **Android** | ✅ 完整支持 | Windows / macOS / Linux | 开箱即用 |
| **iOS** | ✅ 完整支持 | macOS(必须) | [iOS 配置指南 →](https://gitee.com/chang-xinping/mobile-mcp/blob/master/docs/iOS_SETUP_GUIDE.md) |
---
### iOS 设备(macOS)
iOS 自动化需要额外配置 WebDriverAgent,请参考:
📖 **[iOS 配置指南 →](https://gitee.com/chang-xinping/mobile-mcp/blob/master/docs/iOS_SETUP_GUIDE.md)**
快速检查连接:
```bash
tidevice list
```
---
## 🎯 新用户快速入门
### 第一步:安装(二选一)
```bash
pip install mobile-mcp-ai(通过 PyPI 安装 目前暂时没维护建议通过源码安装)
pip install -r requirements.txt (从源码安装依赖)
```
### 第二步:连接设备
**Android 用户:**
```bash
# 开启手机 USB 调试,连接电脑
adb devices
```
**iOS 用户:**
```bash
# 安装依赖
pip install tidevice facebook-wda
brew install libimobiledevice
# 检查连接
tidevice list
```
> 📖 iOS 需要额外配置 WebDriverAgent,详见 **[iOS 配置指南](https://gitee.com/chang-xinping/mobile-mcp/blob/master/docs/iOS_SETUP_GUIDE.md)**
### 第三步:本地开发配置 Cursor的MCP(根据自己项目路径修改)
**源码安装推荐配置(更明确):**
```json
{
"mcpServers": {
"mobile-automation": {
"command": "python3",
"args": ["/Users/mac/Desktop/mobile_mcp/mobile_mcp/mcp_tools/mcp_server.py"],
"cwd": "/Users/mac/Desktop/mobile_mcp",
"env": {
"PYTHONPATH": "/Users/mac/Desktop/mobile_mcp",
"MOBILE_PLATFORM": "android"
}
}
}
}
```
**Pypi安装推荐配置:**
```json
{
"mcpServers": {
"mobile-automation": {
"command": "mobile_mcp",
"env": {
"MOBILE_PLATFORM": "android"
}
}
}
}
```
> 💡 提示:会自动检测 Android/iOS 设备,无需额外配置
### 第四步:重启 Cursor
保存配置后,**重启 Cursor** 使配置生效。
### 第五步:开始使用
在 Cursor 中输入:
```
@MCP 检查设备连接
```
```
@MCP 截图看看当前页面
```
```
@MCP 点击"登录"按钮
```
---
## ⚙️ 高级配置
### 方式一:pip 安装后配置(推荐)
先安装:`pip install mobile-mcp-ai`
```json
{
"mcpServers": {
"mobile-automation": {
"command": "mobile_mcp"
}
}
}
```
### 方式二:源码方式配置
如果你是从源码运行:
**Android 配置:**
```json
{
"mcpServers": {
"mobile-automation": {
"command": "python",
"args": ["-m", "mobile_mcp.mcp_tools.mcp_server"],
"cwd": "/path/to/mobile_mcp",
"env": {
"MOBILE_PLATFORM": "android"
}
}
}
}
```
**iOS 配置:**
```json
{
"mcpServers": {
"mobile-automation": {
"command": "python",
"args": ["-m", "mobile_mcp.mcp_tools.mcp_server"],
"cwd": "/path/to/mobile_mcp",
"env": {
"MOBILE_PLATFORM": "ios"
}
}
}
}
```
> ⚠️ 请将 `/path/to/mobile_mcp` 替换为你的实际项目路径
>
> 📖 iOS 需要先配置 WebDriverAgent,详见 **[iOS 配置指南](https://gitee.com/chang-xinping/mobile-mcp/blob/master/docs/iOS_SETUP_GUIDE.md)**
保存后**重启 Cursor**。
## 🚀 使用示例
在 Cursor 中直接对话:
**基础操作**
```
@MCP 列出当前页面所有元素
```
```
@MCP 点击"登录"按钮
```
```
@MCP 在用户名输入框输入 test123
```
**应用控制**
```
@MCP 启动微信
```
```
@MCP 打开抖音,向上滑动 3 次
```
```
@MCP 列出手机上所有已安装的应用
```
**截图分析**
```
@MCP 截图看看当前页面
```
```
@MCP 截图,然后点击页面上的搜索图标
```
**测试脚本生成**
```
@MCP 帮我测试登录流程:输入用户名密码,点击登录
```
```
@MCP 把刚才的操作生成 pytest 测试脚本
```
**组合操作**
```
@MCP 打开设置,找到 WLAN,点进去截图
```
```
@MCP 打开微信,点击发现,再点击朋友圈
```
---
## 🛠️ 工具列表
| 类别 | 工具 | 说明 |
|:---:|------|------|
| 📋 | `mobile_list_elements` | 列出页面元素 |
| 📸 | `mobile_take_screenshot` | 截图 |
| 📸 | `mobile_screenshot_with_som` | Set-of-Mark 截图(智能标注) |
| 📸 | `mobile_screenshot_with_grid` | 带网格坐标的截图 |
| 📐 | `mobile_get_screen_size` | 屏幕尺寸 |
| 👆 | `mobile_click_by_text` | 文本点击 |
| 👆 | `mobile_click_by_id` | ID 点击 |
| 👆 | `mobile_click_at_coords` | 坐标点击 |
| 👆 | `mobile_click_by_percent` | 百分比点击 |
| 👆 | `mobile_click_by_som` | SoM 编号点击 |
| 👆 | `mobile_long_press_by_id` | ID 长按 |
| 👆 | `mobile_long_press_by_text` | 文本长按 |
| 👆 | `mobile_long_press_by_percent` | 百分比长按 |
| 👆 | `mobile_long_press_at_coords` | 坐标长按 |
| ⌨️ | `mobile_input_text_by_id`